Once you have your expenses table how you want it, you might want to print it off. One of the things I get asked quite a lot is how to set up the page ready to print, whether it be just on 1 page, or have repeated rows across the top on several pages. So this tutorial is to show you the basics of preparing to print 🙂
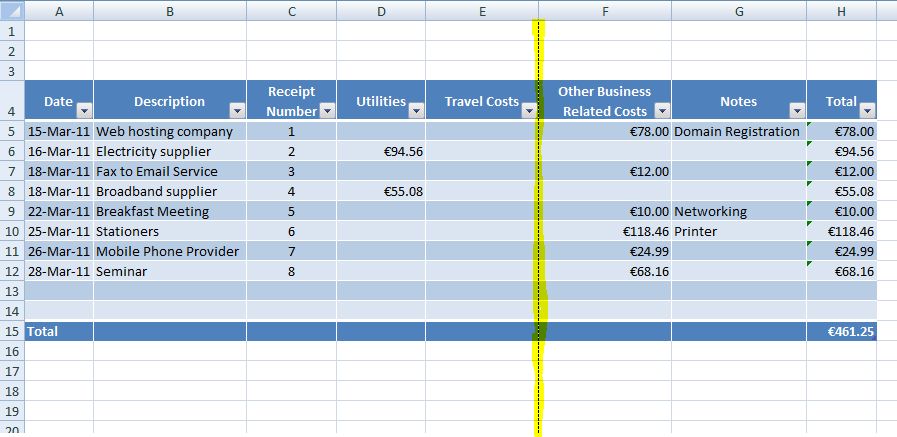
Firstly, you may notice a dashed line going through the expenses table – this is what is known as a page break, so it shows you where the end of the page currently is.
In order to make any changes to the print setup, you need to go to Page Layout on the ribbon and click the expansion symbol (in bottom right corner of section) in the page setup section.
This will open up the Page Setup menu. In here you can choose the paper size, orientation, margins, header/footer, and whether you want to print gridlines, repeated rows etc.
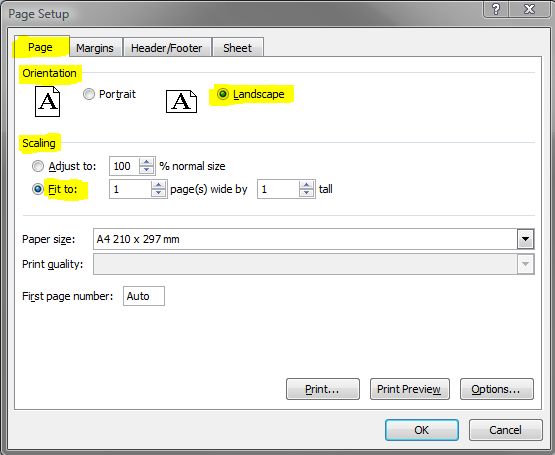
Given the size of our expenses table, we probably want to print this all on one page. Make sure Page is selected in the dialogue box and tick “Fit to” in the Scaling section, we can leave it as 1 page wide by 1 tall. Obviously if you wanted to have it 1 page wide by 2 pages tall, this is where you would change it. The page is currently set in Portrait, our table would probably look better (& fit better) if the paper was Landscape. This can be changed at the same time as the scaling. You can also change the paper size, if needed, it’s automatically defaulted to A4 size.
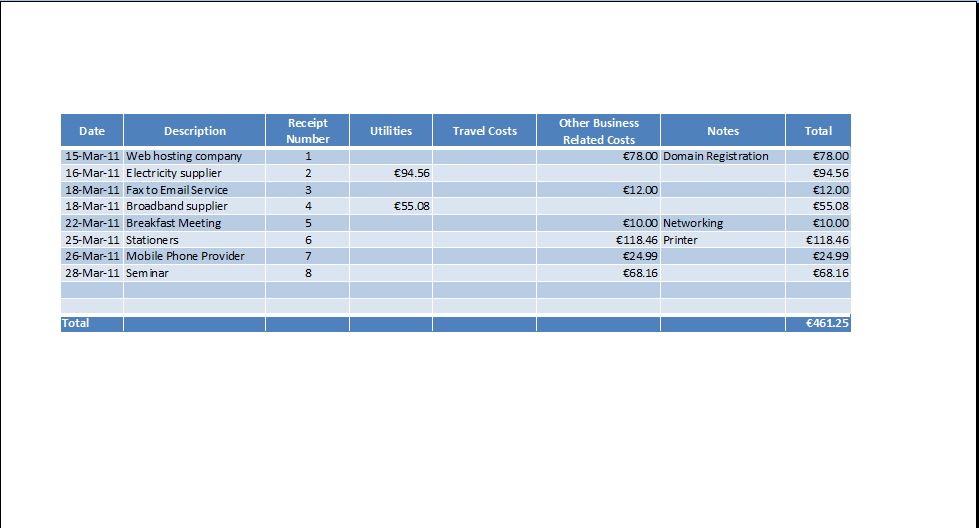
If you select Print Preview at the bottom, this will take you to the preview page so you can see exactly how your page will look when printed. As you can see, it’s changed to fit 1 page and is now landscape.
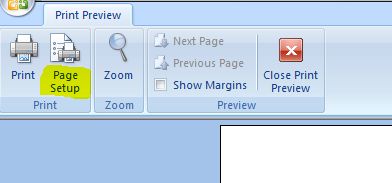
You can go back to Page Setup in this screen by clicking it in the top left corner.
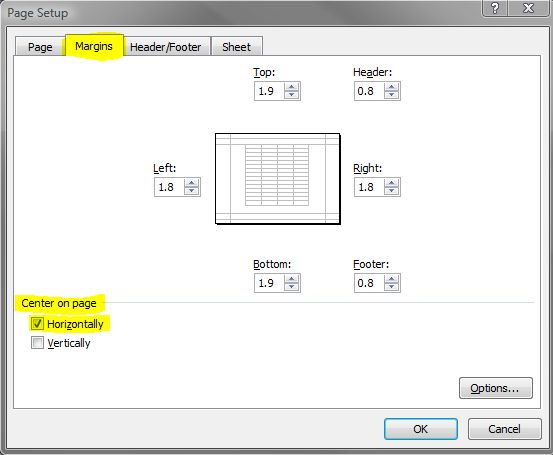
This will bring the menu back up again. We’ve finished with the Page section, so now click on the Margins section. Here you can change the measurements of the margins if you wish to. At the bottom you also have the option to centralise the information horizontally & vertically on the page. If you tick Horizontally, this will move the table across into the centre of the page.
Next, you can choose a Header / Footer if you want to. Click on the section, and you’ll see drop down arrows next to Header and Footer. This is handy if you want to have the page number or the actual saved name of the file on the page. You can also insert your own custom headers / footers if you want, a logo for example, by clicking on custom Header / Footer. I’ve chosen a header just to show as an example.
Click OK, and you’ll see all the changes have been made to the layout of the page.
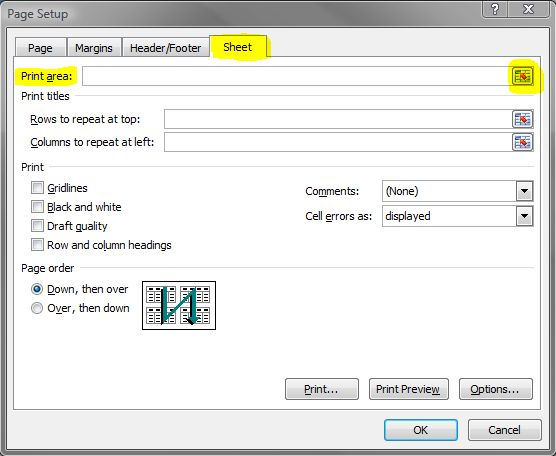
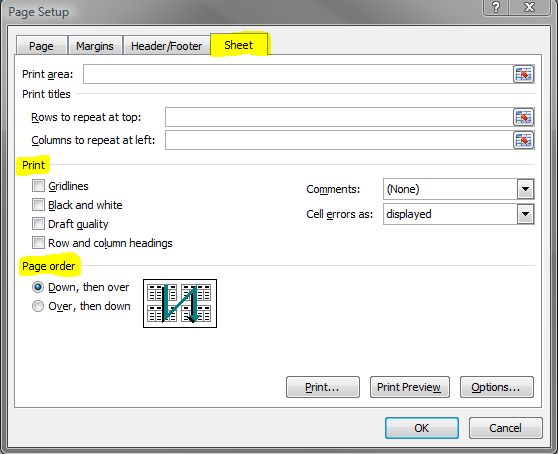
The final tab, Sheet, cannot be changed whilst in preview mode, so close print preview and go back to the actual table. Click on the Page Setup tab in the Page Layout section of the ribbon (as before), and now select Sheet. This brings up options of the areas you wish to print or repeat. So, if you only wanted to print columns A and B, you would click on the box to the right of the Print area.
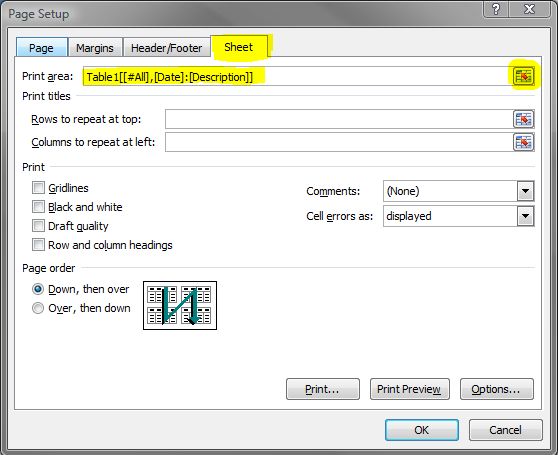
You can then highlight the data you want to print, click back on the box and it inserts the area for you.
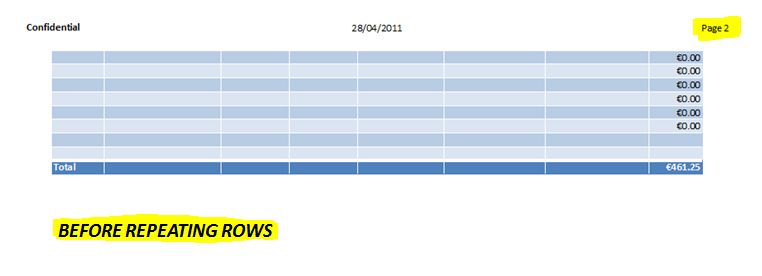
Another option you can do is repeat rows / columns on several pages. For example if this table continued on to a second page, you might want the column headers to show on the last page. To do this, click on the box to the right of the Rows to repeat at top, highlight row 4 (or whichever row contains the table headers), and click the box again.
You can also repeat columns at the left (if your table was more than 1 page wide).
Diagrams below show before and after repeating rows:-
The next section is where you can choose to print gridlines, row and column headings (i.e. A B C 1 2 3 etc), any comments that have been inserted, and if you want it in black & white or draft quality.
In the case of this table, we’ll probably leave everything as is, but feel free to play around 🙂
Click OK and you’re good to print – or go back to print preview just to make sure you’re happy with the final layout!
In my next tutorial, I’ll show you how to copy and rename the worksheet so you can have separate tables for every month.

