
It’s always handy to have your most recent documents displayed at the top of the list when you click into Recent Documents, however you can customise this list so it contains as many documents as you wish. In later versions of MS Office, you can also select which documents to keep at the top of your Recent Documents list. Below is a quick guide on how to do this (click on the images to enlarge)…
MS Office 2003
If you are using the 2003 version, click on Tools, select Options, click into the General tab, change the number for the Recently used file list, and click OK…


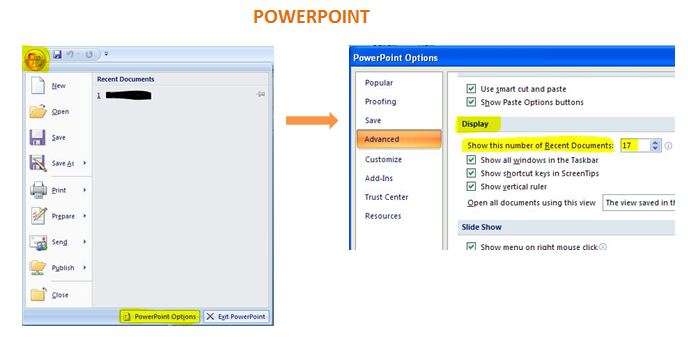
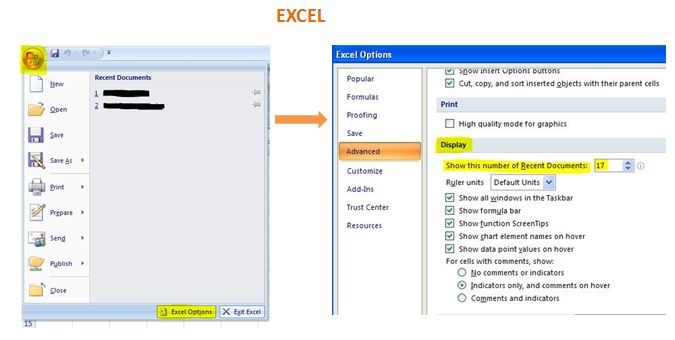
Microsoft Office 2007
If you are using the 2007 version, click on the Microsoft Office Button, select Options, click on Advanced from the menu on the left, scroll down to the Display section, change the number of the Recent Documents and click OK…

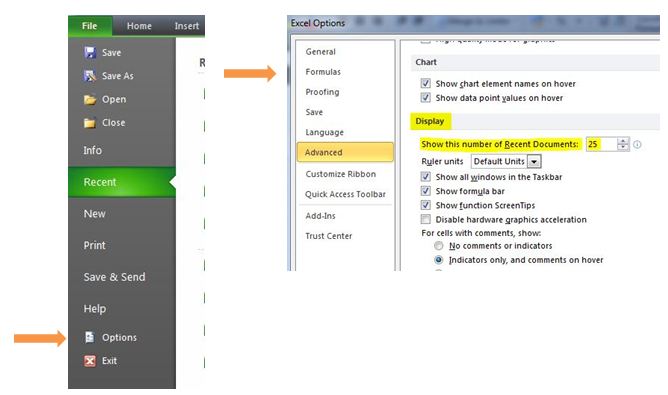
Microsoft Office 2010
If you are using the 2010 version, click on File, select Options, click on Advanced from the menu on the left, and again scroll down to the Display section, change the number of the Recent Documents and click OK.
If you want to clear the list of your recent documents, just change the number to 0 in the above options.
In the later versions of Microsoft Office, you’ll notice a small pin symbol to the right of the recent files list. If you want to keep a file in your list, push the pin and the symbol will change from this… ![]() to this…
to this… ![]()
This means the file is permanently “pinned” to your list – click on the symbol again to “unpin” the file. Another quick way in MS Office 2010 is to right click on the file name in your Recent list and choose either to Pin the file to the list, Remove from the list, or Clear all unpinned documents.
I use at least 4 different spreadsheets on a daily basis, so I find the pinning option a really useful tool – I hope you do too 🙂