Anybody who has ever typed a large document in Word will know how invaluable a Contents Page is, and I don’t mean the page that you manually type out then have to keep changing the page numbers as you add more & more to the pages! I mean the automated one that is a feature in Word 2007. It is surprisingly simple to create and keep updated, below is a guide on how to do this 🙂
To start building your Contents Page, you need to apply heading styles to the relevant titles within your document. To do this, just highlight the relevant text and click on the Heading you like in the Styles section on the Home tab.
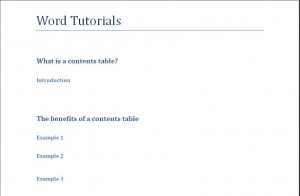
For example, the document below shows the name of the chapters and their subheadings with the Headings 1 and Headings 3 styles applied.
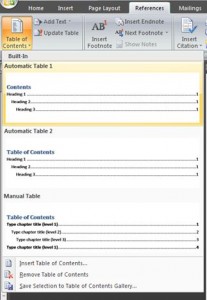
Place the cursor at the point where you want the Contents Table to be, go to the References tab on the ribbon, and click on Table of Contents…
A drop down menu will appear showing examples of different styles of Contents Pages, just choose which one you prefer…
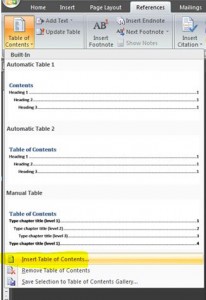
If you want to edit the actual Contents Page before inserting it, e.g. if you don’t want to show page numbers etc, just click Insert Table of Contents…
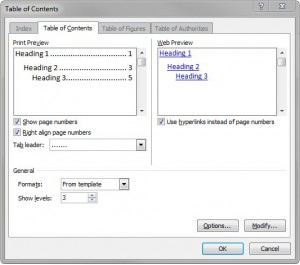
This will open a dialogue box where you can customise the table to your own preferences…
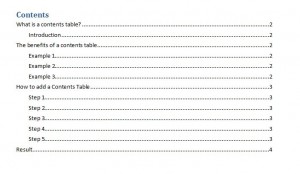
And that’s it, a new Contents Table will appear…
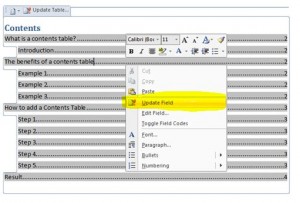
If you make any changes to the document at any stage, for example another 2 pages of text is added thereby throwing all the page numbering out, you can easily update the Contents Table in 2 clicks! You can either right click anywhere within the table and choose Update Field…
Or, click on Update Table in the Table of Contents section in the References tab on the ribbon…
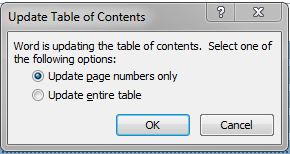
Whichever way you choose, a dialogue box will appear asking if you want to update the page numbers only or the entire table. Choose which one you want to do and click OK…
And that’s it! A quick and simple way of inserting and editing a Contents Page, without the need to manually update everything 🙂

