
We all know that tables are a great way of displaying data and we tend to associate them with Excel spreadsheets, however they are also easy to insert and use in Word. This basic tutorial is split into 2 sections; the first shows you how to insert a table in Word and the second shows you how to use the formatting options.
SECTION 1 – Inserting Tables
Firstly, click on the Insert tab on the ribbon and go to the Tables section…
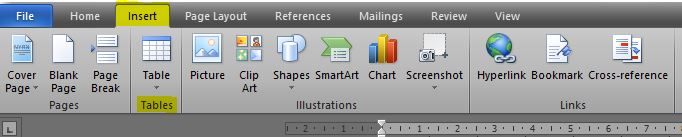
Click on the drop down arrow and you’ll be given a number of options…
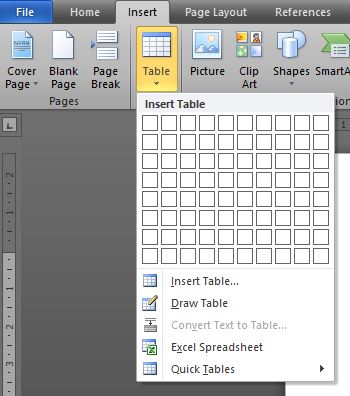
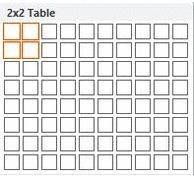
1) The grid is a quick way for you to draw out a table…
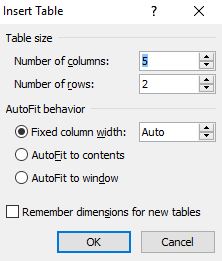
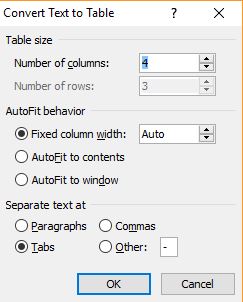
2) Insert Table opens up a dialogue box allowing you to input the number of columns and rows, and choose the column widths…
3) Draw Table allows you to size the table exactly as you like – the cursor changes to a pencil and you draw each cell of the table to a size you want…
4) Convert Text to Table is for when you have a section of text and numbers and you realise it would look a lot better if it was in a table. All you need to do is highlight the text you want to include and click Convert text to table…
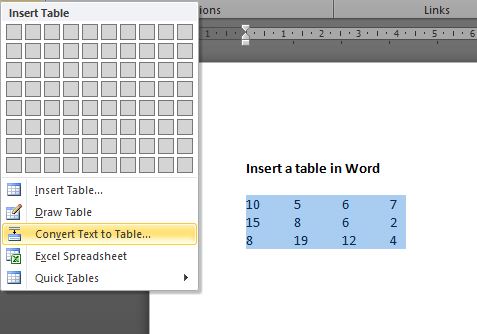
This opens the following dialogue box for you to select the number of columns etc…
5) Excel Spreadsheet allows you to insert a table from an Excel spreadsheet.
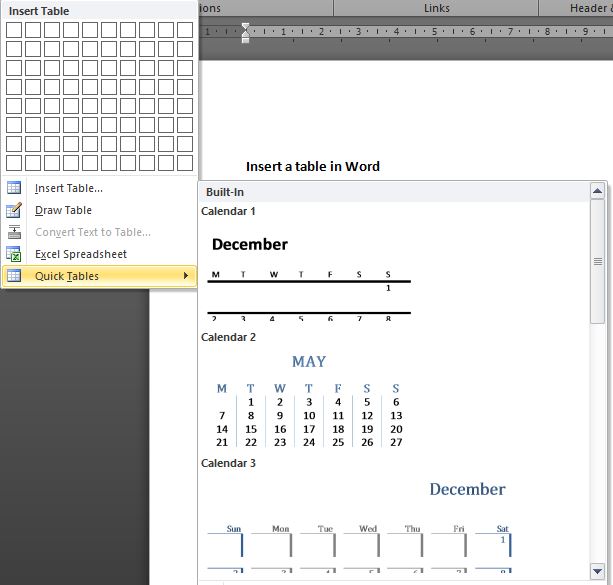
6) Quick Tables is a speedy way of inserting ready-made tables e.g. calendars, tables with subheadings etc. Once inserted into your document you can then format them the same as “normal” tables.
SECTION 2 – Formatting Tables
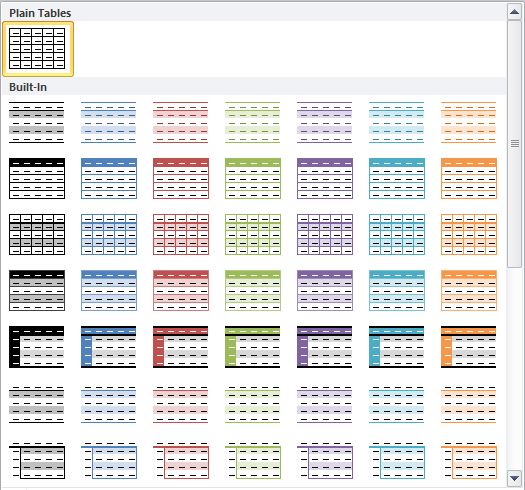
Whenever you click anywhere in the table a Table Tools tab will appear on the ribbon…
![]()
The Table Tools are divided into 2 sections – Design and Layout.
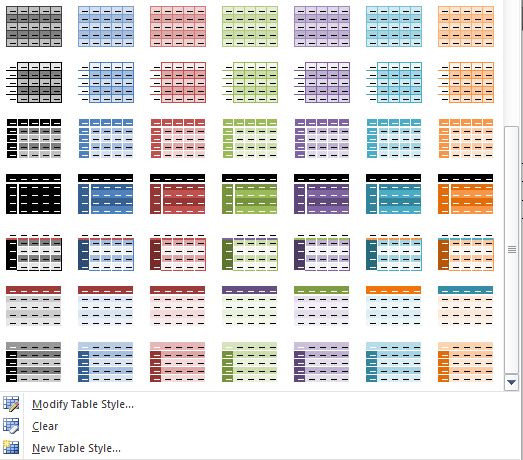
Design (as per the above image) gives you options of how you want the table to look. Click on the drop down arrow on the scroll bar in Table Styles and an extended menu appears offering more design options along with an option for you to modify the table if you don’t quite like the style…

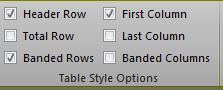
The Table Style Options section of the ribbon allows you to select whether you want the header row, first column, last column to be in bold, whether you want the columns & rows to be banded, and also whether you want to include a totals row at the end of your table…
Obviously the design of the table is all about preference and it’s up to you how you want your table to look 🙂
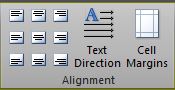
Layout allows you to add and delete rows & columns, adjust height and widths, control text alignment, sort data and insert formulas…
![]()
The Alignment section on the ribbon is handy if, for example, you want your text to be perfectly centred in their cells…
The Data section lets you sort cell data, convert your table to plain text, insert formulas and repeat header rows…
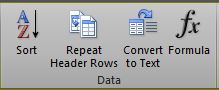
If your table continues on to another page, click Repeat Header Rows and the header row of the table will repeat at the top of each page.
I will cover the Formula section in a separate tutorial. In the meantime I hope you’ve found this basic beginner guide to tables in Word helpful 🙂